
KLAUWE Ribs 2.0 is a variation on an earlier recipe for Spareribs on your KLAUWE and comes from the offline and online designer of KLAUWE. Absolutely delicious; the meat falls off the bone and is wonderfully tender with a crispy crust. Impress Your Friends!
The best spareribs are made by taking plenty of time, but it can also be done between other activities. To make delicious KLAUWE Ribs 2.0, you need to let the spareribs (slow) cook on the KLAUWE for at least 4.5 hours. For meatier and thicker spareribs, we recommend cooking them for at least 5.5 hours. Your KLAUWE has a water reservoir, which is a key success factor for this recipe! With KLAUWE’s water reservoir, you don’t need to cook low and slow for 10 hours like some BBQ enthusiasts suggest. We'll show you how. And of course, you'll make the sauce yourself. Store-bought sauces are too easy and everyone uses them. Besides, you'll have plenty of time to make your own sauce.
Ingredients
General:
- Servings: 4 people (average is 650 grams per person)
- Preparation time: 10 minutes
- Cooking time: approximately 4.5 hours in 3 sessions at around 110 degrees Celsius
Ingredients for rub:
- 3 kg Thick spareribs (unmarinated) from a good butcher
- 2 tbsp Paprika powder
- 2 tbsp Garlic powder
- 1 tbsp Salt
- 1 tbsp Black pepper
- 2 tbsp Brown sugar
Ingredients for glaze:
- 4 tbsp Chili sauce
- 4 tbsp Ketjap manis
- 8 tbsp Honey
Instructions
Preparation of spareribs:
Spareribs are a dish where you really need to buy the thick ribs from a good (certified) butcher. Most ribs found in the supermarket are just not thick and meaty enough! So buy them from a good meat supplier; that’s half the battle. When you have bought thick ribs from the better butcher, start by removing the membrane on the concave side of the ribs. You can remove this with a knife. (If you’re friends with your butcher, you can obviously ask him to do it for you.) Some people say you should leave this on to prevent the ribs from drying out, but with your KLAUWE, you won't have that problem, so just remove it.
We start with only the spareribs, and we don't do anything with your KLAUWE yet. We are not going to marinate the ribs or anything like that. No, we are going to apply a rub that we make ourselves. Put the ingredients for the rub in a small bowl and mix them well. Then, rub your ribs thoroughly with these spices. Rub both the top and the bottom well.
Then cover your ribs with, for example, aluminum foil and let them stand covered for two hours. Do NOT put them in the fridge because the ribs should not be too cold when they go on the grill (the meat shouldn't get a shock).
What to do with your KLAUWE:
Turn on your KLAUWE and set the temperature to about 110 degrees Celsius. When lighting your KLAUWE, use more oxygen, so close the air vent at the back and fully open the air vent at the front. If the fire does not catch well, you can open the air vent at the back for a while. Eventually, the air vent at the back should be closed again, and the air vent at the front should be almost closed. The air vent in the lid should be half open. (Of course, this depends on how the temperature behaves. More air means more fire and higher temperature, and vice versa; it's a matter of playing with the oxygen.)
How to light your KLAUWE again:
Place the charcoal basket on the third level (counted from the top), and if you want to bend less, you can also place the fire basket on a higher level. Fill the fire basket well with charcoal (we're going to grill for at least four and a half hours) and place some brown firelighters among the coals in various places. Then light the firelighters with a flame. You can also use a crème brûlée torch, which is faster and easier. Let the coals (use good charcoal and not briquettes) get up to temperature, at least 15 minutes. The other parts, such as the grill grate and water ring and water reservoir, come later.
When the flames in the KLAUWE are doing their job, you can head to the fridge for a drink, break time!
Setting Up Your KLAUWE:
When most of the flames in the fire basket have died down and a gray glow is visible on the coals, lower the fire basket with the KLAUWE lifting rod to level 1 (all the way at the bottom) in your KLAUWE. This can be a hot job for your hands, so use protective gloves, such as the Bear KLAUWE.
When the fire basket is placed at level 1, place the water ring with a filled water reservoir on level 2. Use your KLAUWE lifting rod for this, and you can also add white wine or strong drink to the water reservoir. Ensure the water reservoir is well filled because we don't want it to "boil dry." (Therefore, at least 2/3 filled!) Check in between and top up with hot water if necessary. For placing the water ring and water reservoir, we also recommend using protective gloves.
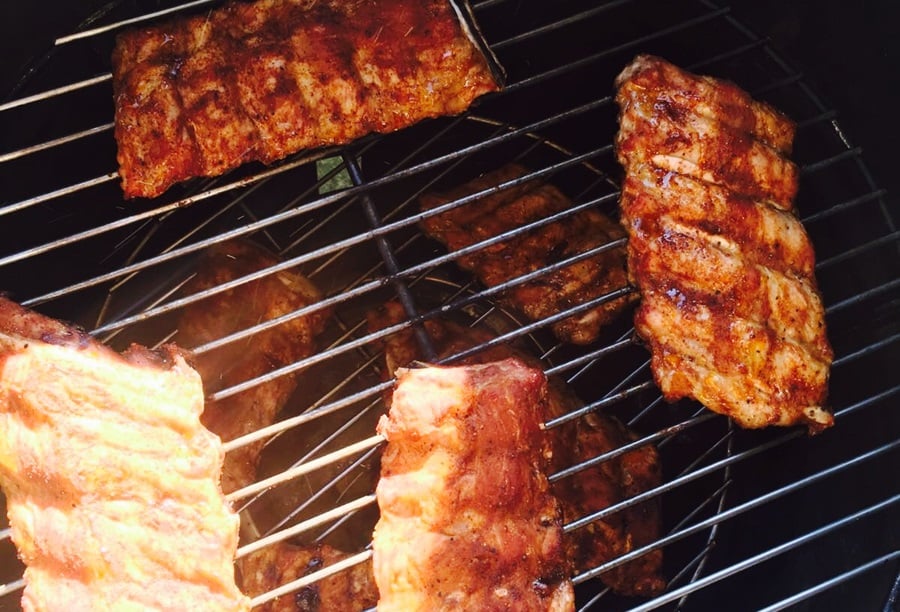
One of the last steps for now is placing the grill grate. Lay the grill grate on level 3 or 4 (counted from the bottom) because the lid will go on the KLAUWE. Use a barbecue glove for placing the grill grate or use your KLAUWE Rooster Lifter. If you have many eaters, you could consider using two grates (grate on level 3 AND level 4!). An extra grate is available in our webshop. (Go to KLAUWE webshop for extra RVS grate.)
How to maintain a continuous temperature of about 120 degrees:
As mentioned earlier; ensure the air vent on the lid is almost closed (only ¼ open at most). The vent at the front (bottom) of the KLAUWE should also be open for a maximum of ¼ part. It can take some time for the temperature to stabilize. The amount of coal in the fire basket and the filling of the water reservoir determine the temperature and its course. By opening or closing the vent at the front (bottom) of the KLAUWE, you can control the temperature in the KLAUWE. This does not have to be exactly 110 degrees. Between 100 and 120 degrees is fine. (You can also use a core thermometer that you bring into the KLAUWE through the air vent in the lid. This allows for more accurate measurement if desired.) Occasionally check the temperature, and by adjusting the vent at the front, you can correct it if needed.
Session I) The ribs go on your KLAUWE for the first 2 to 2.5 hours:
Now everything is ready; place the spareribs with the "concave side" down on the grill grate. Put the lid on, and now it's 2 hours (up to 2 and a quarter hours) of waiting. You don't need to turn them in between! Keep an eye on the temperature and add more oxygen if the temperature is too low, and reduce oxygen if the temperature is too high.
For butcher's spareribs, keep 2 hours in mind, and for thicker and meatier spareribs, you can keep 2 hours and a quarter in mind. (For thinner "supermarket ribs," it's more like 1 hour and 45 minutes).
Session II) The second session of the ribs, the next 2 to 2.5 hours:
After your ribs have been on the grill for two to two and a quarter hours, take the ribs off the grill and wrap each "slab" of ribs separately in aluminum foil, not too tightly but loosely and wrapped closed. Then place the packages with ribs back on the grill and let them lie there for another 2 to 2.5 hours. (For normal ribs, 2 hours, and for thicker ribs, 2.5 hours.) The temperature during this session is still about 110 degrees.
Session III) The last session of 30 minutes?:
When the ribs have been on for the second shift, take your ribs off the grate again. Now remove the water ring with the water reservoir from your KLAUWE. What remains are the fire basket and the grill grate. We are now going to glaze the ribs and grill them for a while. Then, raise the fire basket one (or two) levels.
Note: do NOT place the ribs directly over the fire! Some fat will still drip from the ribs, and if it hits the hot coals, you'll get flames, and the ribs will burn, which we don't want. Place the ribs, for example, on the edge of your grill grate, but not directly over burning coals.
Glazing your ribs:
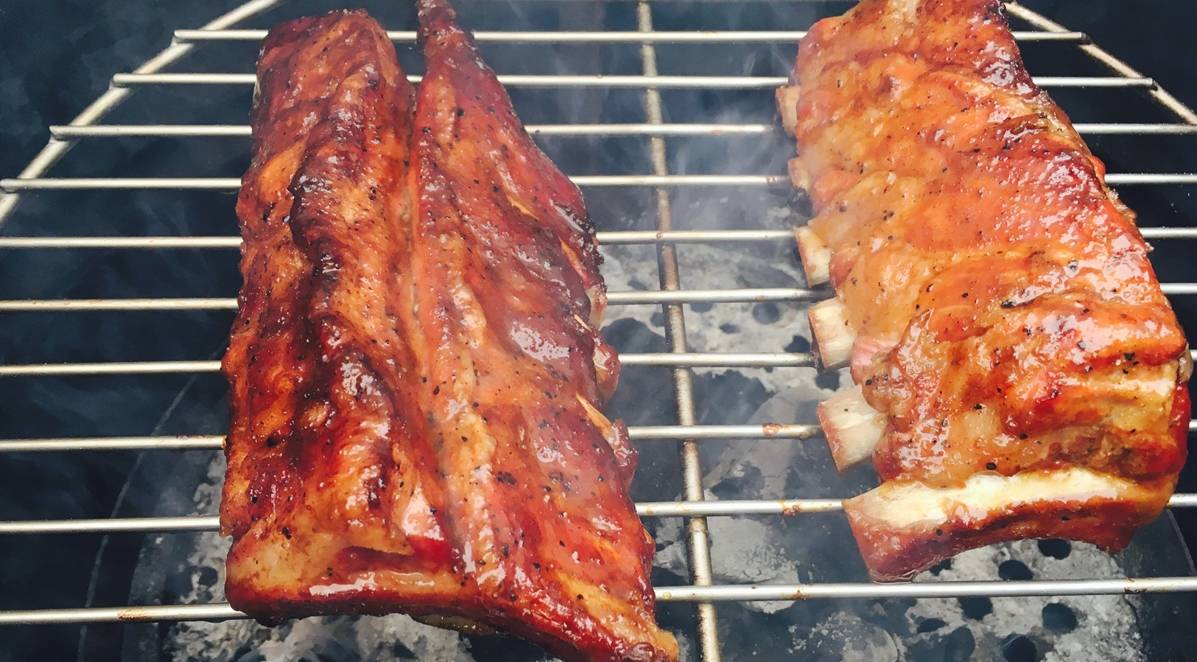
During the last and previous session of 2 to 2.5 hours, you have had enough time to make your glaze. This means mixing chili sauce, ketjap manis, and honey and stirring well. Brush this glaze on both sides of your ribs with a silicone brush. During this last session of 30 minutes, you need to turn your ribs and brush them with the glaze a few times. When you have glazed one side of your ribs, grill that side down. If you want an even crispier crust, extend this session a bit, but be careful not to burn the ribs!
The ultimate moment:
When you have completed the third session, it's time to take your ribs off the grill. Do this carefully and gently. Your ribs are now so tender that they might fall apart.
Serve the ribs with a bowl of water with lemon and napkins. Enjoy!
Bon appétit and don’t forget: Eat with your KLAUWE and Impress Your Friends!